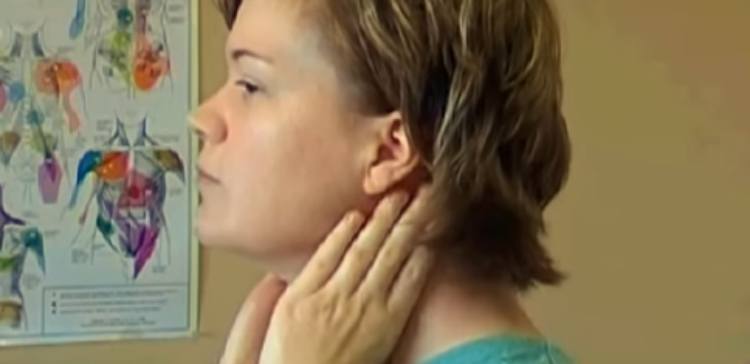
You’ll be focusing on four areas to clear your sinuses, and all four are where fluids settle close to the skin: your head, your neck, around your ears, and the back of your neck.
1- Find the Venus angle. Take your ring finger on each hand, and place them on each side of your collar bone, one on either side of the notch in your throat at the center of your collar bone. Then slide your hands up over the collar bone to the soft tissue of your neck. Lightly and slowly start to pump, with one pump every one to two seconds, or slower. Do 50 to 100 pumps, and you’ll start to feel the fluids move. You may feel like you need to clear your throat; that’s totally normal!
2- Move to the side of your neck. Place the top parts of your palms on either side of your neck, and use the surface of your palms and fingers to pull straight down, along the big muscle in your neck. Repeat about 50 times. You’ll start to feel the fluid beginning to drain from your ears!
3- Move to the back of your neck. Cup your hands together, again using the top part of your palm and fingers. Place your cupped hands on the back of your neck, and again pull downward, about 50 times.
4- Finish up around your hands. Put your hands into the Star Trek “Live long and prosper” salute— i.e. in a V-shape, with your pointer and middle finger forming one side, and your ring and pinky finger forming the other side. Put your ears in the bottom of each V, between the middle and ring fingers. Pull downward toward the bottom of your cheek, about 50 times.
5- Repeat the massages in reverse order: back of the neck, side of the neck, and finishing near your collar bone at the Venus angle.
That’s it! Of course, we learn this kind of method best by seeing it performed, as well as reading the steps, so check out Heather’s video demonstration below!
As always bears repeating, check with your doctor before trying any kind of home remedy. Once you get the all clear and give this one a try, though, be sure to let us know how it goes for you! You can also learn more over on Heather’s site, and an article here at Healthy Food House.
Now, let’s say you don’t have time for a full massage, or you need even quick relief for when pain flares up at work. For that, there are sinus pressure points in your face that can help, and to show us those, we turn to another massage therapist, Amber Lynn Vitale. She recommends doing the following steps:
1- Start at the beginning of your eyebrows. Push up under the brow bone with your fingers or thumbs while sitting at a table, leaning forward to apply pressure.
2- Move to the middle of and slightly above your eyebrow. Apply pressure to the little divot there as long as needed.
3- Move to the far edge of your eyebrow. Do not go out as far as your temple, but find the slight indentation before it. Press and hold, or move your fingers in small circles.
4- Move to the top of your nostrils on the sides of your nose. This spot should be where your cheekbone meets your nasal bone. Press, again while sitting at a table and leaning forward on your elbows.
5- Move slightly down, below your nostrils now, to another indentation, and then out to the middle of your cheekbone. Press up.
Quick and easy! Watch Amber Lynn demonstrate in her video, below:
Even faster, right? It’s so great to have options for all our sinus pain needs!
Have you ever tried lymphatic massage before? Do you think you’ll give this method a try? Be sure to let us know what you think, and share any tricks you have for sinus relief this season.
Source: Tiphero.com

